CANTONESE CHA GUO SAVORY RICE CAKES
------Advertisement-----
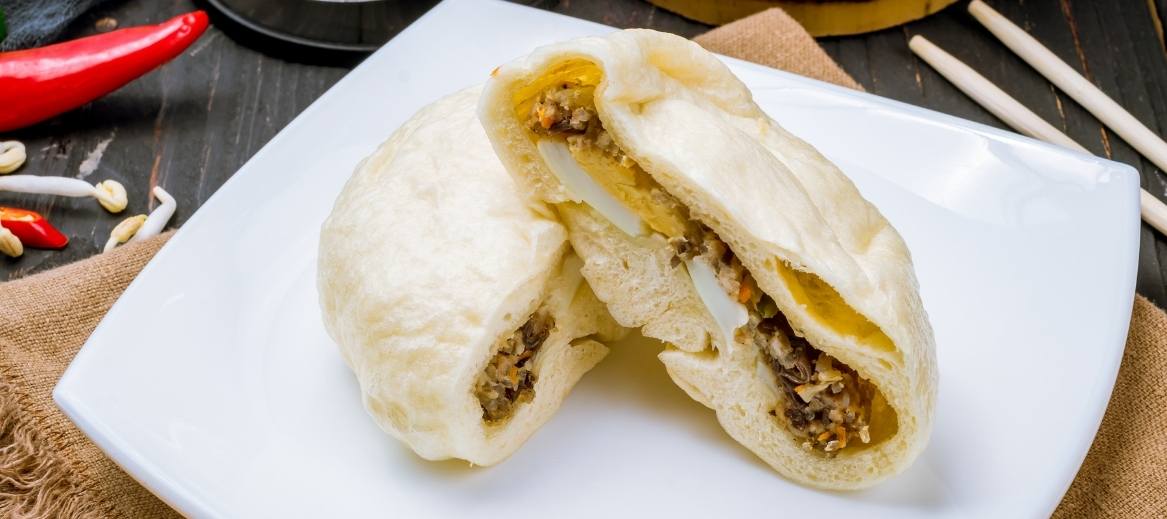
Known as “tea cakes” in Cantonese, glutinous rice flour-based Cantonese Cha Guo is savory pork buns filled with dried shiitake mushrooms, shrimp, and radish.
The Hakka Chinese or kè ji, whose name translates to “guest family,” are the biggest fans of these savory cha guo rice cakes.
------Advertisement-----
Another one of our grandmothers’ favorite Chinese New Year dishes, this cha guo recipe has mostly slipped our collective collective memory banks in the wake of the holiday’s passing.
This was a difficult recipe to nail down. In order to achieve the texture and chewiness I recalled, I had to meticulously document every stage of the process. A combination of vocal guidance (“part of this and some of that”), recollections from my own childhood kitchen, and a great deal of trial-and-error led me to the final recipe. Re-creating that mouthwatering recollection from years ago has finally proven successful after numerous efforts.
------Advertisement-----
We can now add yet another recipe to our collection as a testament to the importance we place on preserving the culinary heritage of our families.
Before we get started with the actual cha guo recipe, I strongly advise that you purchase a digital kitchen scale so that you can work with weight measures. The consistency of measuring cups and spoons is worrisome.
Here we go! Let’s get started with these childhood classics, shall we?
INGREDIENTS:
- 680 g of coarsely grated daikon radish
- 115 g of ground pork
- 25 g of dried shrimp
- 6 zong, cut into 24 4-inch squares
- 5 cups of glutinous rice flour
- 5 dried shiitake mushrooms
- 5 tablespoons of vegetable oil
- 2 cups of boiling water
- 2 tablespoons of oyster sauce
- 2 1/4 teaspoons of salt
- 2 teaspoons of cornstarch
- 2 teaspoons of Shaoxing wine
- 2 finely chopped scallions
- 1 cup of all purpose flour
- 1/2 teaspoon of sesame oil
- ½ teaspoon of sugar
- 1/8 teaspoon of white pepper
- 1/4 cup of mushroom soaking liquid
- 1/3 cup of tapioca starch
- toasted sesame seeds
INSTRUCTIONS:
- Rinse and cut four 3- to 4-inch squares from each of the six zong leaves after soaking them overnight. If you don’t have access to bamboo leaves, parchment paper can be used as a substitute.
- Make sure your shiitake mushrooms are completely submerged by placing a plate on top of them in a basin of hot water. Remove and discard the mushroom stems. You can rehydrate the mushrooms by placing them back in the water if they appear to be dry on the inside. You’ll need the water you soaked the mushrooms in, so slice them finely and set them aside.
- Soak the shrimp for 30 minutes in boiling water. Drain the shrimp into a sieve and give them a quick rinse before cutting them up.
- Add 5 tablespoons (75 ml) of vegetable oil to a medium-low frying pan or wok. Make a second container with 2 teaspoons of heated oil for brushing over the cha chou when they come out of the steamer.
- Stir-fry the dried shrimp for 30 seconds or so in the oil, until they begin to release their aroma. For another 30 seconds, or until the ground pork is opaque, continue to stir-fry. Add the Shaoxing wine and the sliced shiitake mushrooms.
- Grate the daikon, scallions, sesame oil, oyster sauce, and 1 1/4 teaspoons of salt, sugar, and white pepper into the pot. Once simmering, continue to cook for a further 3 to 4 minutes, or until the daikon radish is barely soft.
- Remove any debris or sediment from the bottom of the bowl and whisk together 2 tablespoons cornstarch and 1/4 cup of the remaining mushroom soaking liquid. Keep cooking and stirring for 2 minutes or so until all liquid has evaporated from the mixture in the wok. Set aside and allow it cool to room temperature.
- All-purpose flour, tapioca starch and the remaining 1 teaspoon of salt should be mixed together in a large mixing dish. To create a dough, combine the dry ingredients in a large bowl with a wooden spoon or rubber spatula, then add 2 cups of boiling water. Knead the dough until it forms a ball. A tablespoon of glutinous rice flour at a time can be added to a sticky dough. After spreading out the dough, let it sit in the bowl for at least 20 minutes.
- To save time for Chinese New Year, when I’ll be preparing a second half batch of dough, I only made half the original recipe for these images.
- In order to prevent drying out, divide the dough into 24 equal pieces of about 45 grams each, and keep them covered with a damp dish towel. Cha Guo Rice Cakes should be made using a digital scale to ensure they are the same size.
- Each small ball of dough should be flattened into a disc by pressing on it. Roll the disc’s edges out to a diameter of 3 12 to 4 inches using a rolling pin. By making the disc’s perimeter slightly thinner than the center, you can avoid having too much dough on one side after pinching and sealing it together.
- Place the 35 g of filling in the center of the dough disc and press it down firmly. Press the filling together into a ball with a spoon so there are no air spaces. To ensure that each cha guo rice cake is the same size, use your kitchen scale to weigh out the filling.
- Then, pinch the dough around the disc’s edges until the opening is completely sealed. There is no need to worry about the seam of the cha guo tea cake because it will be the bottom. You just have to make sure it’s sealed up tight and not leaking.
- You’ll now need to coat one of your zong leaves and the bottom of the cha guo in the “cooked” vegetable oil that you’ve saved for later. Gently flatten it by pressing on it.
- Keep an inch of space between each of the cubes by placing them in a bamboo or metal steamer. Cha Guo Rice Cakes can be stored on one level with room for 4 to 5 cakes. Increase the capacity of your bamboo steamer by stacking the tiers. For 10 minutes at a time, steam your cha guo rice tea cakes.
- Once the rice cakes are done, top each one with a pinch of toasted sesame seeds and gently press them into place. To keep the cha guo from drying out, use a basting brush and a little of the cooking oil you set aside earlier.
- Serve the cha guo heated whenever you like! It’s also an option to let them cool completely and then put the frozen ones on a plate, using plastic or parchment paper in between each layer. You may store them in the freezer for up to a month in an airtight bag.