If you have any frozen red bean paste from creating other red bean sweets like Chinese bakery red bean bread, mooncakes, or red bean buns, then you should definitely make some Red Bean Mochi (forever my childhood love).
------Advertisement-----
MOCHI: JAPANESE VS. CHINESE
As delicious as Japanese mochi is, it can’t compare to the sweetness of Chinese mochi. Except for that, they’re essentially the same! Naturally, I lean toward the Chinese style but feel free to tweak the red bean filling’s sweetness to suit your own palate.
COOLING THE SWEETNESS DOWN
Making your own red bean paste is something I’ve always recommended because it allows you more control over the sweetness and uses fewer preservatives.
------Advertisement-----
Red bean paste is time-consuming to make, so I’ve always advocated making extra to store in the freezer. So, this recipe is just another excuse to whip up a big batch and clear up the cupboards.
However, I’ve been so preoccupied with the cookbook as of late that I’ve resorted to using pre-made red bean paste.
------Advertisement-----
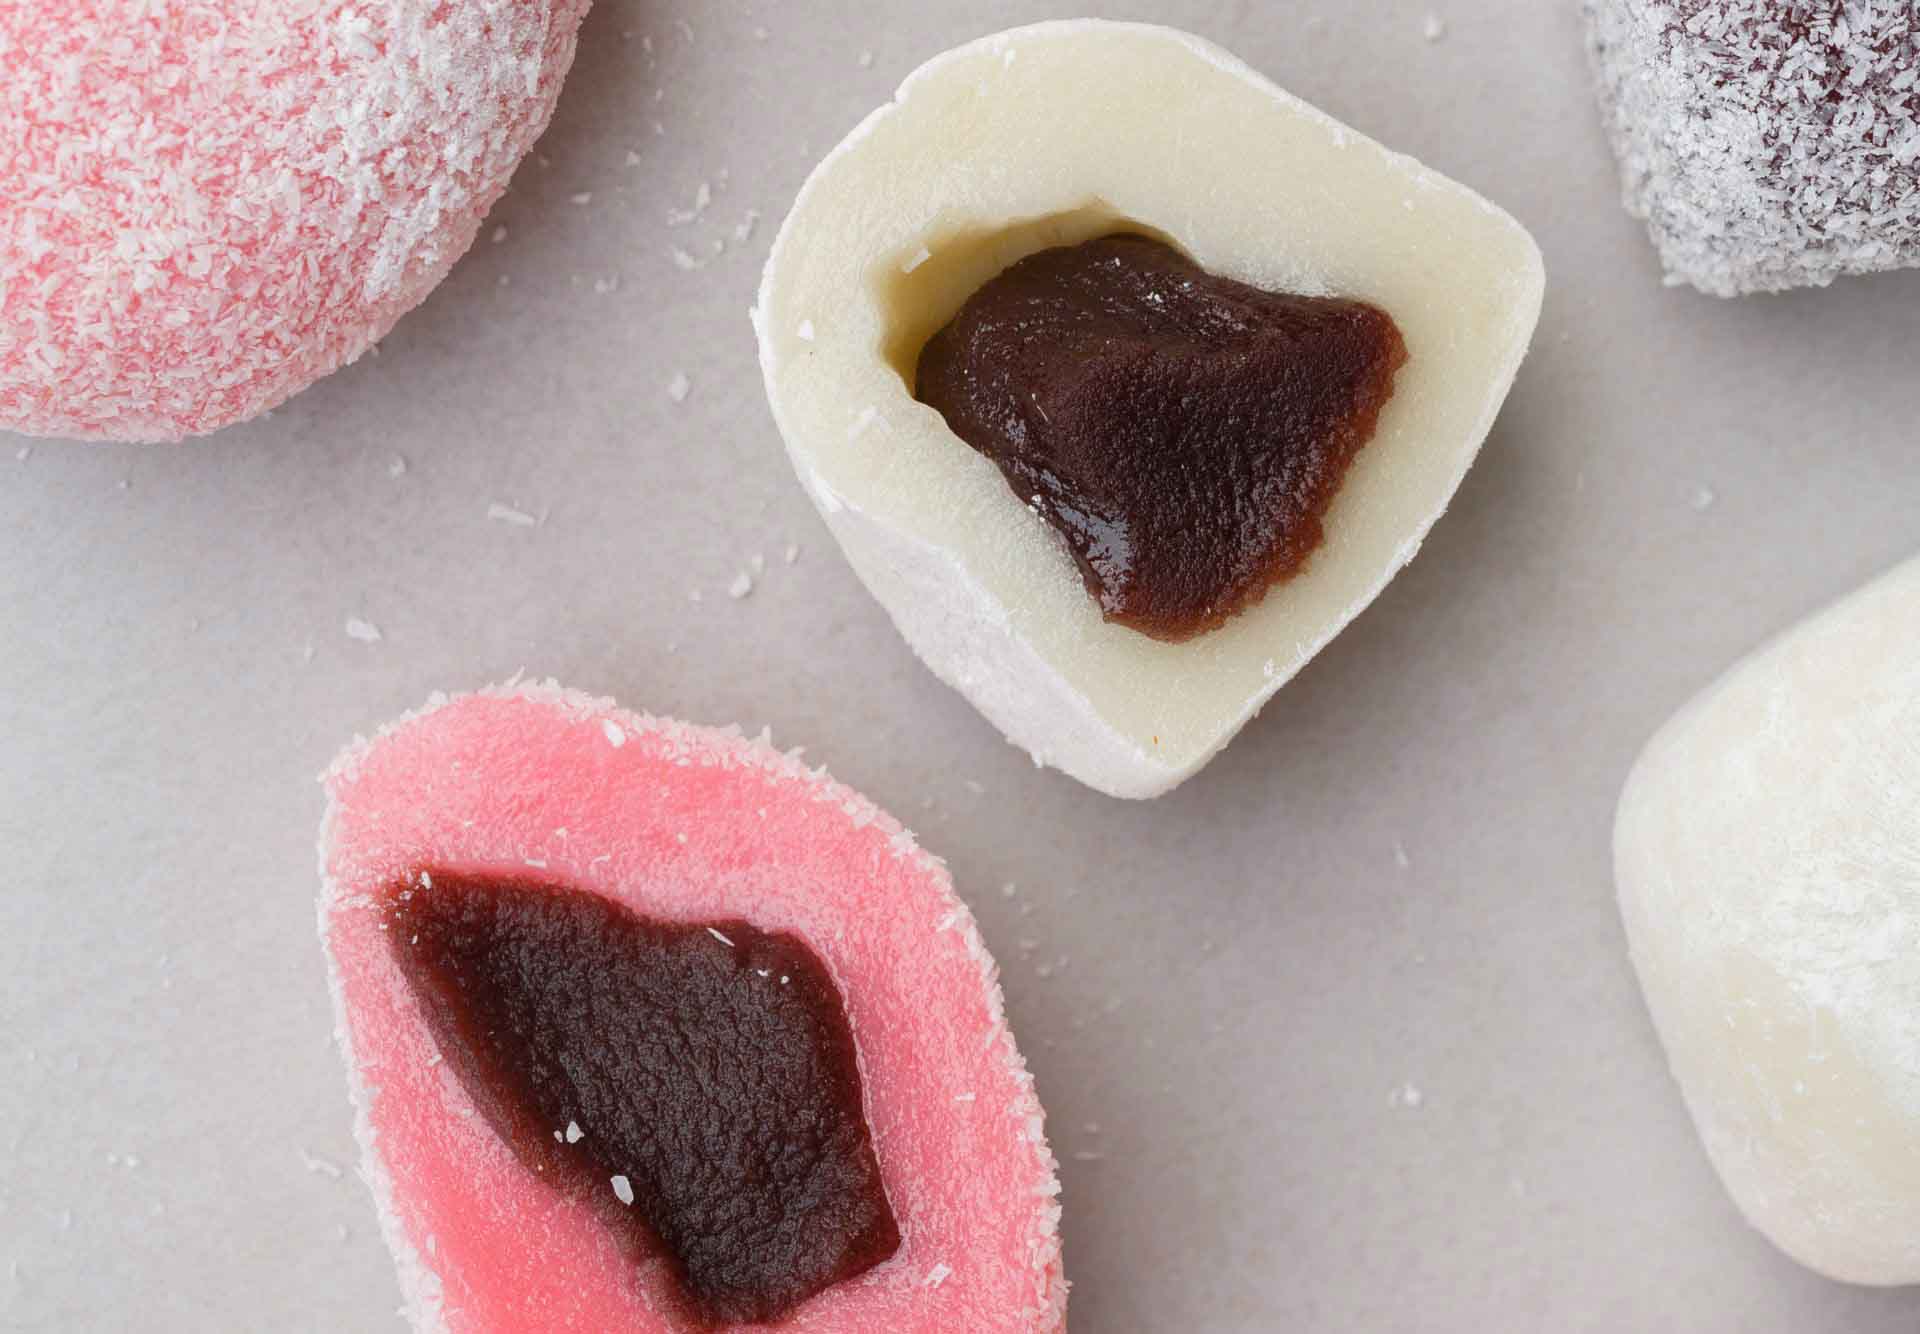
How, then, does one regulate the degree of sweetness? To counteract the sugar, I used more mochi dough. Because of this, the mochi is bigger and more rounded than usual, looking like contented infant.
Make the mochi smaller if you’re using your own red bean paste, and you’ll end up with 16 tiny mochi instead of 9.
MODIFYING THE RED BEAN MOCHI TO YOUR TASTE
Mochi is well-known for its powdery texture. The most frequent method of keeping mochi from adhering to your hands or other surfaces is the outer covering of cooked sweet rice flour. This is not a choice.
To coat your food, you don’t have to stick to just using sweet rice flour.
Optional toppings include crushed peanuts, toasted coconut flakes, and roasted sesame seeds!
INGREDIENTS:
TO COAT THE MOCHI:
- 1/4 cup of sweet rice flour
FOR THE MOCHI DOUGH:
- vegetable oil for brushing
- 1 1/2 cups of sweetened or unsweetened coconut milk
- 1 1/2 cups of sweet rice flour
- 1/4 cup of caster sugar/superfine sugar
- 1/4 cup of cornstarch
- 2 tablespoons of melted coconut oil
FOR THE RED BEAN PASTE FILLING:
- 10-14 ounces of red bean paste
INSTRUCTIONS:
PREPARE THE MOCHI COATING:
- One-fourth cup of the sweet rice flour goes into a spotless, dry pot. Ten minutes over medium heat, or until the flour emits a faint odor of smoke, is sufficient. In order to avoid burning, stir the mixture frequently.
- Set aside to cool to room temperature while you prepare the rest of the mochi ingredients.
PREPARE THE MOCHI DOUGH:
- Coat a square cake pan that is 11 inches by 11 inches (preferably nonstick) with vegetable oil. Set aside.
- Fill the steamer up with water and get it boiling.
- While the water is heating to a boil, in a big bowl, combine the sweet rice flour, coconut milk, cornstarch, caster sugar, and melted coconut oil until there are no more lumps.
- Put the dough in the prepared cake pan and tap it on the counter a few times to spread it out. For 15 minutes over high heat, once the water in the steamer has boiled, steam the dough. Take it off the stove and let it cool entirely on the counter.
ROLL THE RED BEAN PASTE INTO BALLS:
- Cover and refrigerate the red bean paste for at least 30 minutes. Rolling the filling into balls and putting the mochi together are both simplified with cold red bean paste.
- Form the paste into balls using lightly greased palms. Put it down on a plate and set it away.
ASSEMBLE:
- Put the dough on a big sheet of wax paper to cool. Lift the sticky mochi off the pan using a bench scraper that has been lightly greased.
- You can divide the dough into 9 or 16 even squares.
- Brush your fingers with oil and then take a small piece of dough and press some red bean paste into the middle. Pinch the dough closed around the filling to seal it in. Oil your fingers just enough to keep the dough from adhering to your hands but not so much that it prevents the dough from closing.
- Coat the mochi by rolling it in the sweet rice flour that has been baked. Roll it gently between your palms to release any extra flour.
- Put one mochi into a paper cupcake cup, seam side down. All the mochi must be built in this manner.