It’s no surprise that this recipe for chili oil has become one of the most popular on the blog. It’s not only a tasty addition to many of our dishes; it’s an essential component.
In response to reader inquiries and suggestions throughout the years, we have revised this recipe to include additional information and clarification and a wider range of alternatives so that you can make it just the way you like it.
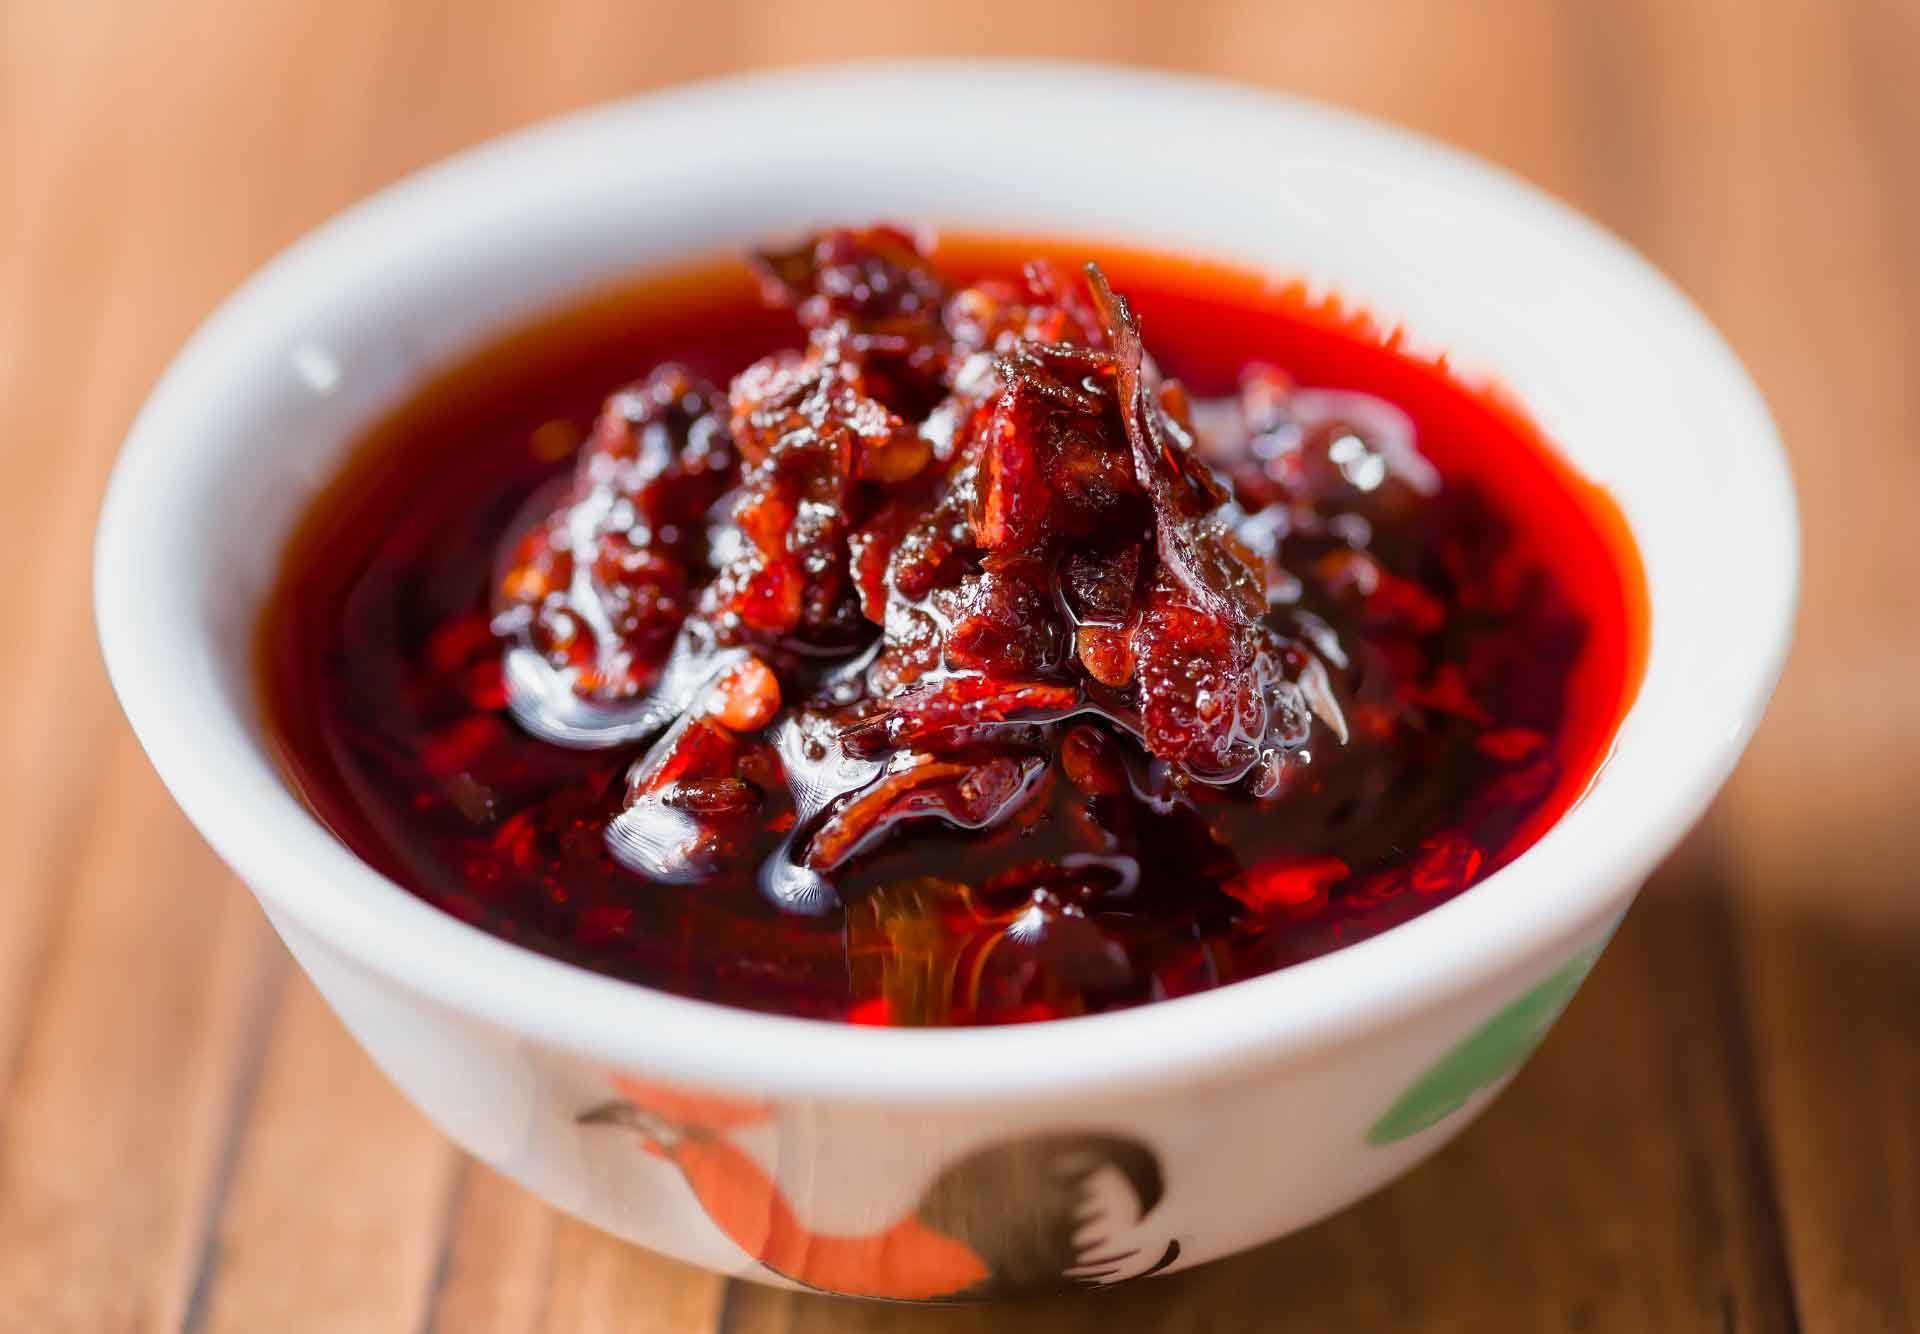
Every problem can be solved with a little chili oil.
It won’t take long for you to notice that chili oil and hot sauce are two of our favorite things in the world.
Our fried rice and noodle dishes are notoriously spicy; my father once said, “Hey, you know there are people out there who may not like chili oil,” to which my sister and I responded with blank glances before dousing our food in even more chili oil.
Noodles and fried rice just are the same with a drizzle of spicy chile oil.
Chili oil is an essential component of our Perfect Dumpling Sauce. Without it, our dumplings and bao would be a pale imitation of their potential.
A breakfast of eggs? Have some avocado on toast, please. Is that a pot of gumbo I see on the stove? It’s missing a little something. Naturally, the solution is some hot chili oil.
There is also the need for fantastic handmade chile oil in many traditional Chinese preparations.
Learn the recipe right here!
Ingredients:
- 5 star anise
- 4 nuggets dried sand ginger (optional)
- 3 cloves of garlic (crushed; optional)
- 2 black cardamom pods (optional)
- 2 bay leaves
- 1-2 shallots (halved; optional)
- 1 cinnamon stick
- 1½-3 cups of neutral oil
- ¾-1 1/4 cup of Sichuan chili flakes
- 3 tablespoons of Sichuan peppercorns
- 2 teaspoons of cloves (optional)
- 1 – 2 teaspoons of salt (to taste)
Instructions:
- Collect all of the spices and herbs used for the scent. Use a saucepan with at least two inches of space between the oil’s edge and the pot’s rim, then add your chosen aromatics. One and a half cups of oil should do it if you’re only using minimal aromatics. All the aromatics can be used with up to three cups of oil.
- Start with the oil over medium heat, then reduce the heat to medium-low or low as the oil heats. It’s ideal if the oil is between 110 and 120 degrees Celsius, which will cause the aromatics to progressively release tiny bubbles. Reduce the heat if the spices are sizzling more than that or are browning too soon.
- Raise the temperature gradually if you are not getting little bubbles. Protect yourself from getting burned by keeping the temperature between 200 and 225 degrees F. Try to let the aromatics steep like this for at least 30 minutes and up to an hour.
- Sichuan chili flakes should be prepared and placed in a heat-safe bowl while the oil is infusing. The ideal amount of chili flakes to add to 1 1/2 cups of oil is 3/4 cups. In order to flavor 3 cups of oil, you will need 1 1/4 cups of chili flakes. You have room to play around with this parameter.
- Either warm your oil and filter it through a fine-meshed strainer or use the strainer to remove the spices before heating the oil. If your spices have become particularly dark by this point, it is best to discard them before adding the chili flakes so as to prevent any accidental burning.
- Oil poured over chili flakes should typically be heated to between 110 and 120 degrees Celsius (225 and 250 degrees Fahrenheit). Use a higher temperature, around 135 degrees Celsius (or 250 degrees Fahrenheit), to achieve a deeper shade. A temperature of 225 degrees Fahrenheit (110 degrees Celsius) may be more appropriate if your chili flakes are already extremely roasted. A tiny bowl of chili flakes is a good way to test the oil before using it on the whole batch. Throw the chili flakes into a colander and carefully pour the heated oil over them. Turn the heat up on the oil by stirring it around. When done correctly, the air will have a “popcorn” aroma that is not scorched.
- Add the salt and let the chili oil cool down before serving. Seal containers tightly and keep them refrigerated. To avoid spoiling, always use a clean implement while handling. Under these conditions, it can last for up to six months.