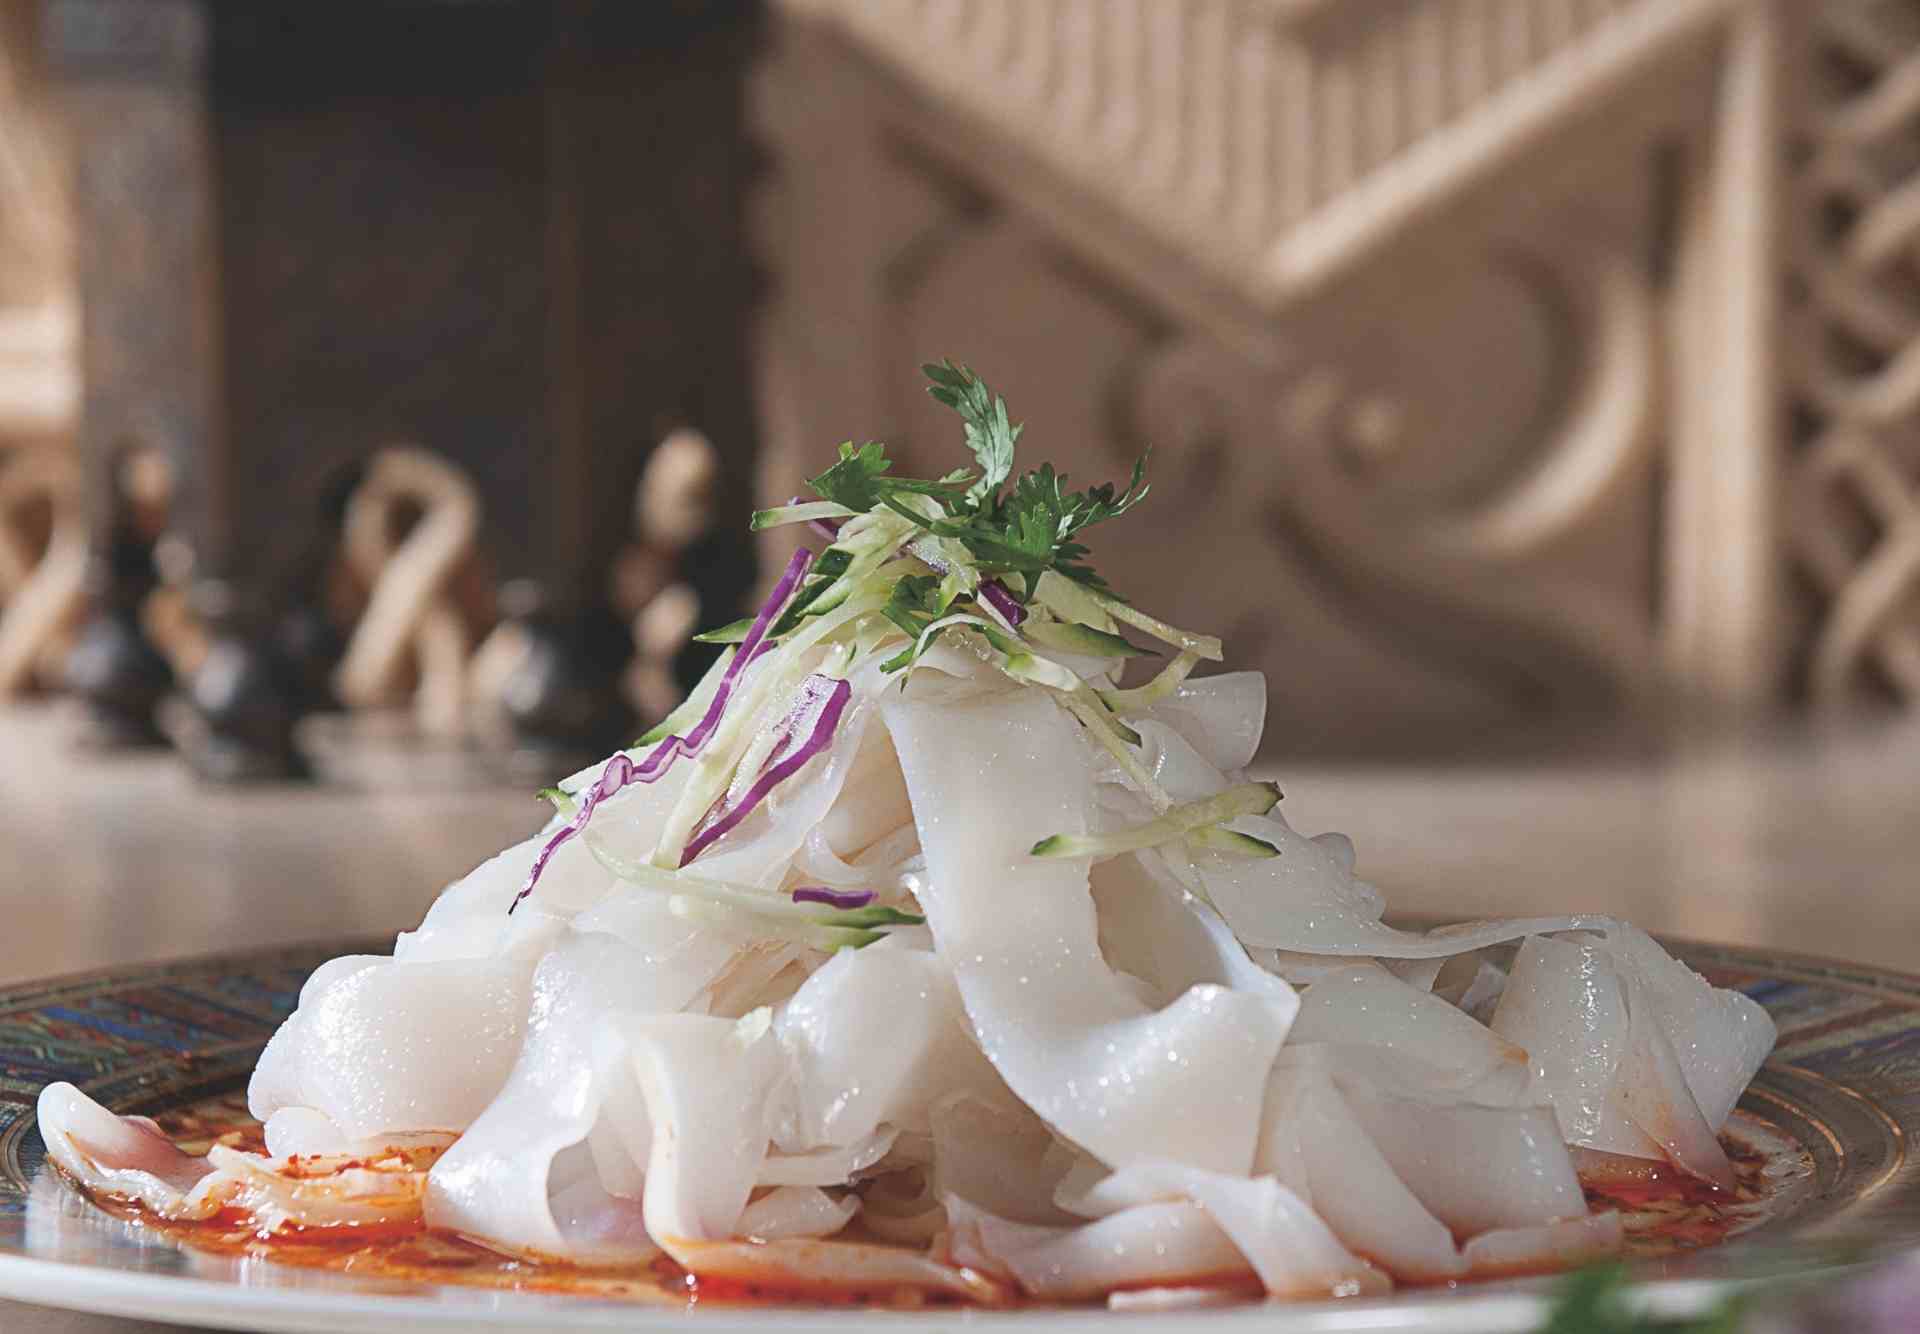
Liangpi, or “cold skin” noodles, is a Shaanxi street snack. It’s popular in China and internationally. Summertime Liangpi meals are excellent.
Liangpi’s springy, elastic, and nearly slippery quality makes it suitable for cold noodle meals topped with cucumber and bean sprouts. Today, I’ll show you how to make liangpi noodles.
You’ll prepare liangpi with flour, water, and salt. It’s a bit of a process, but it’s a fun “project cooking” with a wonderful reward at the end.
LIANGPI NOODLES
Liangpi noodles are wheat or rice. liangpi’s texture is identical to my mom’s homemade rice noodles. Steaming a thin starch-based batter is likewise similar.
Traditional liangpi uses wheat flour. Yes, the all-purpose flour you use most often.
The procedure regularly requires “washing” a flour/water dough (with salt) to separate the starch and gluten. This “washing” may seem odd. When else would you make dough and mash it in water?
After separating starch from gluten, you can produce noodle batter. The heated batter is cut into noodles. Wheat gluten by-products are edible. It’s also called seitan. You get two for one. You get chewy noodles and seitan.
My mom’s Braised Kao Fu (Wheat Gluten) with Mushrooms dish uses this product. Hence, liangpi meals include wheat gluten. Same process! Kaofu’s spongy structure absorbs sauce well.
Making liangpi is easy. Some uses wheat starch and water. Some use flour and water, “unwashed.” These aren’t standard recipes, so you won’t receive gluten.
This recipe shows how to make liangpi properly.
Try this recipe if you can’t locate liangpi at your local Chinese store or want a fun weekend science project (ideal for kids). We all need additional home projects to try.
Ok, recipe time!
INGREDIENTS:
- 450g of all purpose flour
- 250g of water (plus more for washing/batter)
- 4g of salt
INSTRUCTIONS:
SEPARATE THE STARCH & GLUTEN:
- In a large basin or bowl of a stand mixer fitted with a dough hook attachment, combine the 450 g flour and 4 g salt. To make a shaggy dough by hand, mix the dry ingredients with 250g of water gradually. The water should be added gradually while the mixer is on low speed (often the “stir” setting), resulting in a shaggy dough.
- The dough should be kneaded for three minutes or until it comes together into a ball that is rather firm. Just put on some cover and take a 10-minute nap.
- Give the dough another minute of hand-kneading to smooth it out and shape it into a ball. Try to get 30 minutes of shut-eye undercover.
- Put three cups of water into the bowl with the dough. For 5 minutes, submerge the dough in water by pressing it down.
- “Wash” the items. The standard method calls for manual labor. Squeeze and stretch the dough while it is still in the water to extract the starch. The dough should be washed for two to three minutes or until the water becomes opaque white. To save time, you can also use a mixer to combine the ingredients. Return the mixer fitted with the dough hook to the bowl of dough and water.
- Set the mixer to its lowest setting and attach the pouring shield or splash guard. For two minutes, allow the dough hook to gently knead the dough.
- Remove the starchy liquid to a separate big bowl (this is the bowl of starch you will be using to make the noodles). The dough needs to be washed for three more minutes with two additional cups of water.
- Now use a strainer with a fine screen to remove the starch from the water. To complete the third “cleaning,” use two additional cups of clean water.
- After the third batch of starchy water has been drained, replace it with a cup of fresh water, add it to the dough, and knead it for four minutes. To date, you should have completed 6 “washings,” each including 1 cup of fresh water. If you’re using a mixer, knead the dough between your fingers several times after each rinsing to remove as much starch as possible.
- The final amount of starch can be extracted by adding a cup of water and giving it another hand washing, and squeezing for a few minutes. Repeat this process one or twice more until the water is mostly clear and the gluten ball comes together. The water can be safely discarded if it is largely clear rather than being added to the starchy liquid in the bowl.
STRAIN & ALLOW STARCH TO SETTLE:
- Cover the gluten ball with an upside-down bowl and let it rest for at least two hours. You need to keep it covered or it will dry out. To remove any remaining dough particles, pour the starchy water through a fine-mesh strainer into a second, larger bowl.
- Leave it out for 6 hours, preferably overnight. Doing so lets all the starch in the water sink to the bottom of the basin. Starch will appear to settle quickly, but it takes the entire 6 hours for all the starch to settle and merge to itself in the bottom of the bowl.
COOK NOODLES & WHEAT GLUTEN:
- Cook your gluten in a steaming pot of water for 30 minutes, then set it aside. While the gluten is cooking, drain the starchy liquid bowl to reveal a thick glue-like layer of white starch at the bottom. When the water has been removed, scrape the starch off the bottom of the bowl with a metal spoon or ladle and whisk the thick liquid until it is entirely uniform (there should be no lumps of starch remaining). Take 300 grams of the starchy mixture and place it in a medium bowl using a ladle and a kitchen scale.
- Then, incorporate 2 grams (1/2 teaspoon) of salt and 150 milliliters (2/3 cup) of clean water. Reconcile the ingredients to a uniform consistency. The dough for your noodles looks like this.
- Prepare a boil in the steamer. To prepare a round or square cake pan, brush it with vegetable oil (it must be able to fit in your steamer). Drop the batter into the oiled pan so that it barely covers the bottom. Throw it in the steamer right away, cover it, and let it go for a minute or two.
- Concurrently, get ready a big bowl of ice-cold water by filling it up with water and adding a few ice cubes. After using the steamer, place the hot pan on the surface of the cold water to cool. After 1 minute, take the pan from the heat and spray the noodle with oil before removing it with a spatula and your hands.
- Do this again and again, making sure to whisk the batter well each time before adding it to the pan. Any settled starch should be scraped off and added to the batter. Noodles can be stacked as they are made and oiled to keep them from sticking.
- If you find yourself out of batter, simply measure another 300 grams of starch and mix it with 150 milliliters of water. About three total batches can be expected. Just remember that you’ll need around half as much water as starch, so don’t worry if the final amount of starch doesn’t add up to exactly 900g. In general, you may calculate the amount of water you’ll need by halving the weight of the starch you’ll be using (1 gram of water equals 1 milliliter).
- After the noodles have cooked and cooled, you may cut them into thin slices while also cutting the gluten into thin strips.