The focus today is on vegetarians and vegans. Vegetarians and vegans alike will enjoy these Steamed Vegetable Buns.
Numerous dough recipes exist, and everyone has a favored consistency. These buns are based on Bill’s recipe for Chinese Sausage Buns, which I adapted because I want my buns to be airy and just a little chewy.
When creating steamed buns, the dough is at its best when the flour and water are thoroughly mixed, and the dough has a soft, but not wet, feel.
NOTES FOR COOKS
However, there are a few additional discoveries I made while studying that need mentioning. These suggestions are meant to clarify several points, and I do hope they prove useful.
- Even though the dough seems lumpy and tears easily after it has been made, more kneading is required. The final dough must be perfectly smooth. We’re aiming for the navel here, so get ready.
- Soft but not sticky dough is required. One finger should make a dent in the dough with little resistance.
- After the dough has proofed, all of the air bubbles must be removed; otherwise the buns will turn out lumpy.
- Dust some dry flour over your hands, the counter, and the rolling pin before beginning to work with the dough. The buns will stay in place after being pleated, and the process will be considerably simpler.
- The dough needs to be proofed longer if it’s elastic and pulls back when you roll it out.
- All liquid should be removed from the filling before serving. Buns can only be closed properly if the filling is wet and the dough is intact. The buns will also fall flat while heating.
- Don’t give in to the urge to stuff your face. Learn how to pleat properly before proceeding. When there’s too much filling, it’s difficult to seal the buns.
- Each pot of water used for steaming should be ice-cold.
- After the time for steaming or cooking has passed and the heat has been turned off, you must leave the lid on for 5 minutes. When the dough is exposed to cold air prematurely, it can deflate.
INGREDIENTS:
FOR THE FILLING
- 1 pound of baby bok choy (washed thoroughly)
- 8 fresh shiitake mushrooms
- 4 ounces of dried bean curd
- 3 tablespoons of vegetable oil (divided)
- ½ tablespoon of sesame oil
- 1 teaspoon of light soy sauce
- ½ teaspoon of sugar
- ⅛ teaspoon of ground white pepper
- Salt
FOR THE DOUGH:
- 2 cups of all-purpose flour ¾ cup warm water
- 2 tablespoons of cornstarch
- 1 tablespoon of sugar (granulated)
- 1 tablespoon of vegetable oil (plus 1 teaspoon, divided)
- 1 teaspoon of instant yeast
- ¼ teaspoon of salt
- ⅛ teaspoon of baking soda
INSTRUCTIONS:
MAKING THE FILLING:
- Get both a pot of water to boil and an ice bath ready. Blanch the bok choy for just 10 seconds in two separate batches once the water in the pot has come to a boil. Before adding the bok choy to each new pot of boiling water, the water must reach a full boil. As soon as the bok choy has been blanched, it should be removed with a slotted spoon and placed in an ice bath to stop the cooking process.
- Once the bok choy has cooled in the ice bath, strain it. The goal should be to extract as much liquid as possible from the squeezing. To avoid buns becoming soggy, this is a crucial step.
- The bok choy should then be finely chopped; this is where a food processor comes in handy. Put the contents into a basin for further blending. Finely chop the mushrooms. Three to four minutes over medium heat with two tablespoons of oil should be enough to bring out their aroma in a wok. Get absolutely cold.
- The dry bean curd should then be finely chopped and set aside.
- Drain any excess liquid from the bowl of chopped bok choy before mixing in the cooked mushrooms and dry bean curd to complete the filling. Mix in 1 tablespoon of oil, then the sugar, sesame oil, light soy sauce, and white pepper. Combine everything thoroughly. You can season the filling to taste with salt and then chill it in the fridge to marinate. Bok choy may be kept greener with the aid of refrigeration.
MAKING THE DOUGH:
- In a bowl, mix together the water, yeast, and sugar until the yeast dissolves. The yeast needs time to “bloom” and foam, so give the mixture some time (about 15 minutes). Mix in the oil (about a tablespoon’s worth) and set aside.
- In the meantime, whisk together the flour, salt, cornstarch, and baking soda in a bowl. Use a spatula to fold in the yeast mixture. Knead the dough by hand or with a mixer until it is smooth and soft after combining the dry and wet components. Add extra flour, 1 tablespoon at a time, if the dough appears sticky. Knead the dough until it is smooth and soft, adding a few drops of water at a time if it feels dry. The dough must be soft without being sticky.
- Roll the dough in plastic wrap after brushing with oil (1 tsp). Allow the dough to rise to double its original size (about 1 hour). After the dough has doubled in size, it should be punched down and kneaded for several minutes to eliminate all pockets of air. Make 14 even portions of the dough and set them aside. Protect it from drying out by covering it with a clean dish towel.
BUN PREPARATION AND COOKING:
- Put aside 14 squares of parchment paper measuring 3 by 3 inches. Put a dough ball on a clean, lightly floured surface. Roll it out from the edge to the center, flip the dough 90 degrees, and repeat until you have a 4-inch circle. The thickest part of the object should be in the middle. After all, your buns require stable support.
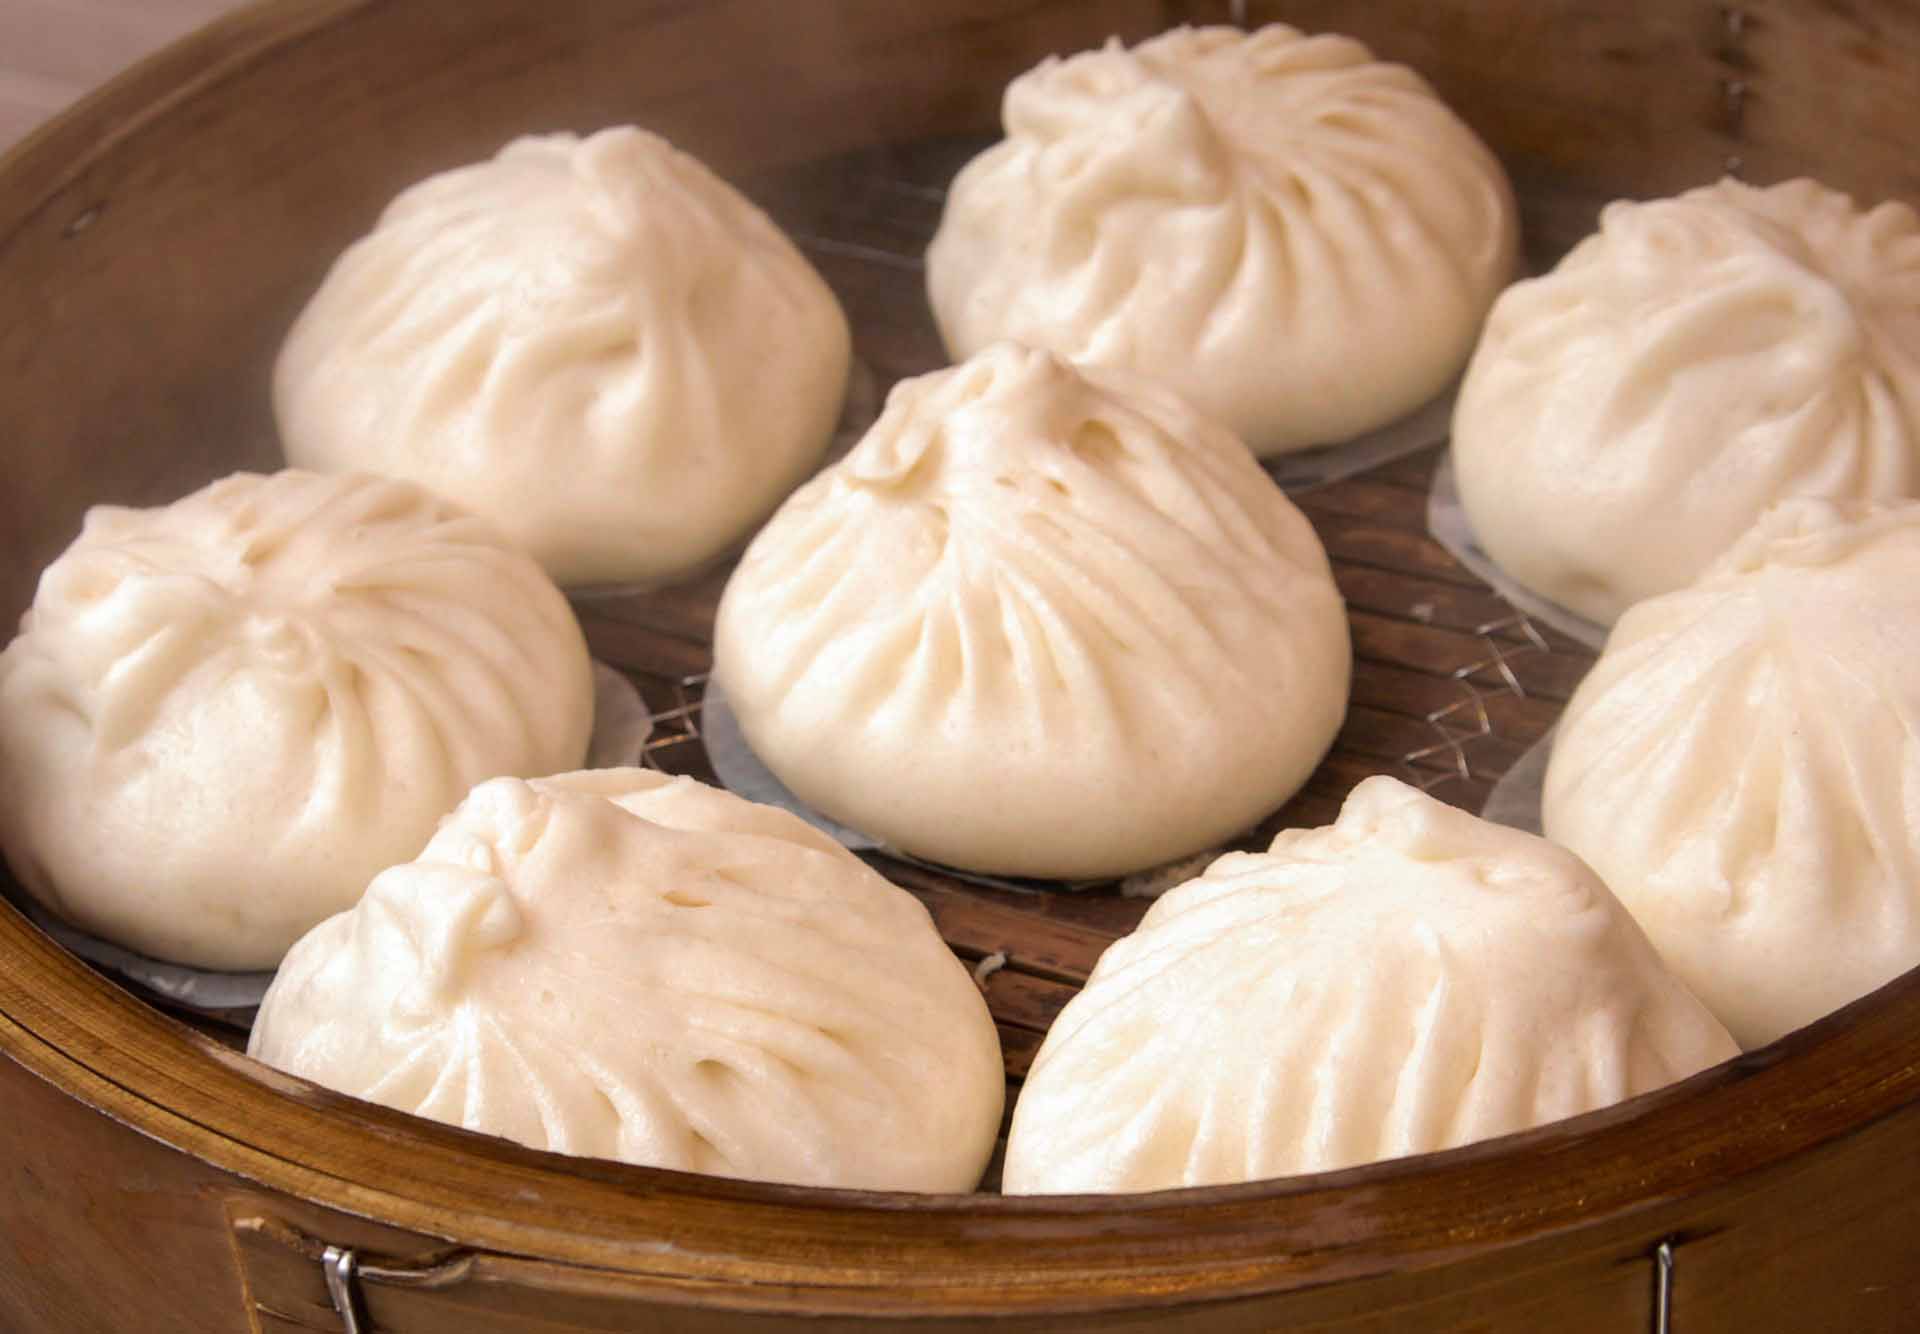
- Fill the center well with about 2 1/2 tablespoons, then pleat and twist the bun several times to seal the filling inside. Place the bun, parchment side up, on the rack of your preferred steaming vessel, making sure there is at least 1 cm of space around it on all sides. It’s going to take a lot of repetitions to get all the buns made.
- For information on how to set up a steamer, visit our page dedicated to Chinese cooking utensils. A bamboo steamer is one option, but you could also use a steamer rack in a wok, a multi-tiered metal steamer, or even a rice cooker. As long as the buns are kept at least 112 inches above the water, you should be fine steaming them in boiling water. Place the buns in the steamer carefully, cover them, and let them sit for 20 minutes (without turning on the heat).
- When you’re ready to steam the buns, put the heat high. When the water reaches a boil and steam appears, reduce the heat to medium and steam the buns for an additional 10 minutes. Turn off the heat after 10 minutes and leave the buns to rest in the steamer for 5 more minutes. DON’T DISCARD THE COVER. If you skip this step, the buns will lose their shape and fluffiness when you take them out of the oven. Additionally, cold water should be used at the beginning of each steaming batch if you are cooking a large number of buns.
- Instant gratification is guaranteed with these buns. The leftovers can be kept in the fridge or freezer if they are sealed properly. Reheat for 1 minute in the microwave or 6-8 minutes in a steam oven.